Literature Reviews in Flexnote: From PDF Annotation to a Connected System
A reusable literature-review workflow: collect papers in Flexnote, annotate PDFs closely, distill key points into cards, tag and filter them in the Card Library, then connect them into a system on an infinite canvas — and export or publish the review. Built for reading papers and writing reviews.
literature review how to read papers PDF annotation Zettelkasten Flexnote workflow
The hard part of a literature review was never "not reading enough" — it's that after reading, nothing stays, nothing connects, and nothing comes out. Highlights are scattered across dozens of PDFs, notes live in different apps, and when it's finally time to write, you start over from scratch. This article gives you a reusable workflow: in Flexnote, turn collect → annotate PDFs → distill into cards → tag and sort → connect into a system → output the review into a single pipeline, so every read settles into reusable knowledge.
1. The whole workflow: five steps
Get the big picture first. The flow has just five steps, and each step's output is the next step's input:
- Collect & import: gather paper PDFs, web pages, and explainer videos into one project.
- Read & annotate: highlight and comment right on the PDF, thinking as you read.
- Distill into cards: turn each point, method, or datum worth remembering into its own card.
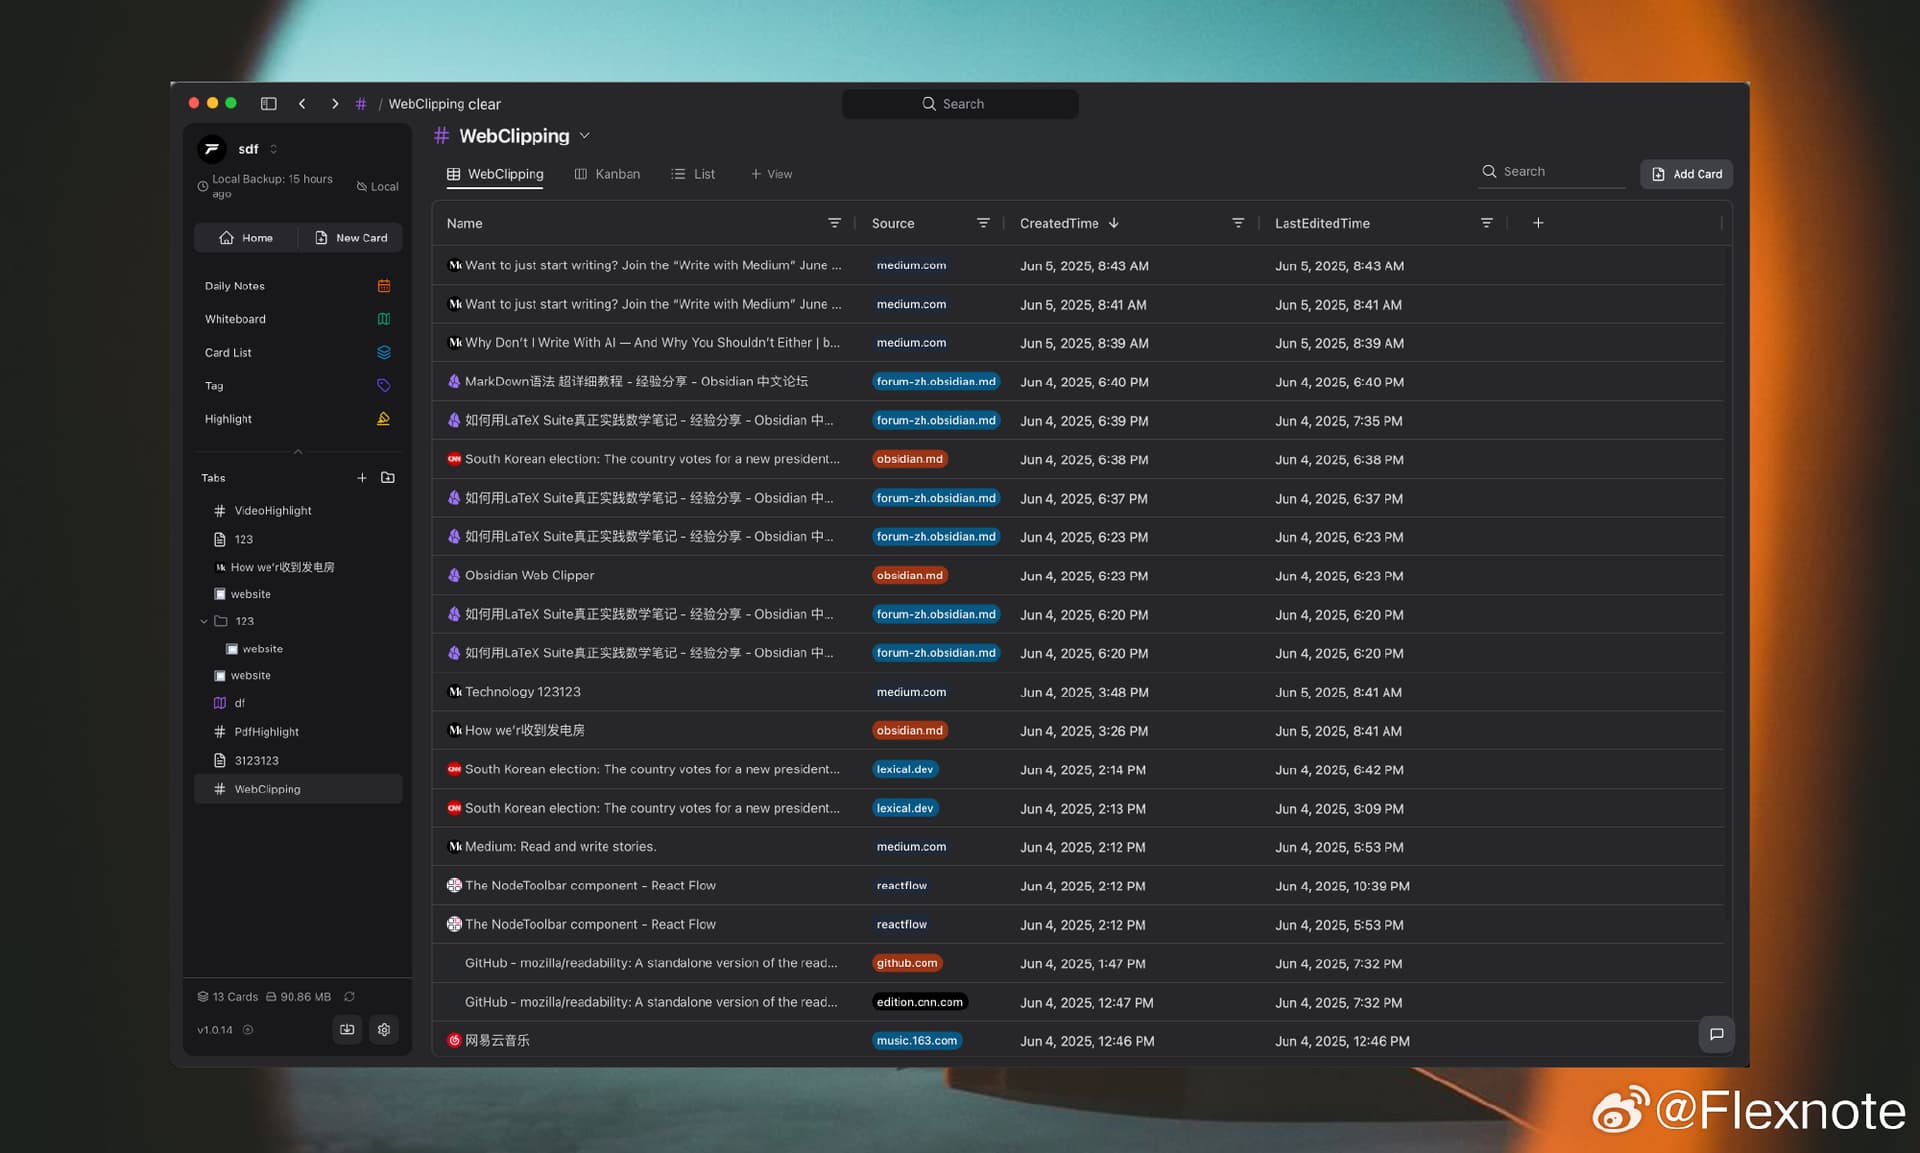
- Sort & tag: organize in the Card Library by theme / method / author.
- Connect into a system: link cards by their argumentative relationships on the canvas, then export or publish.
2. Step 1: Collect and import material
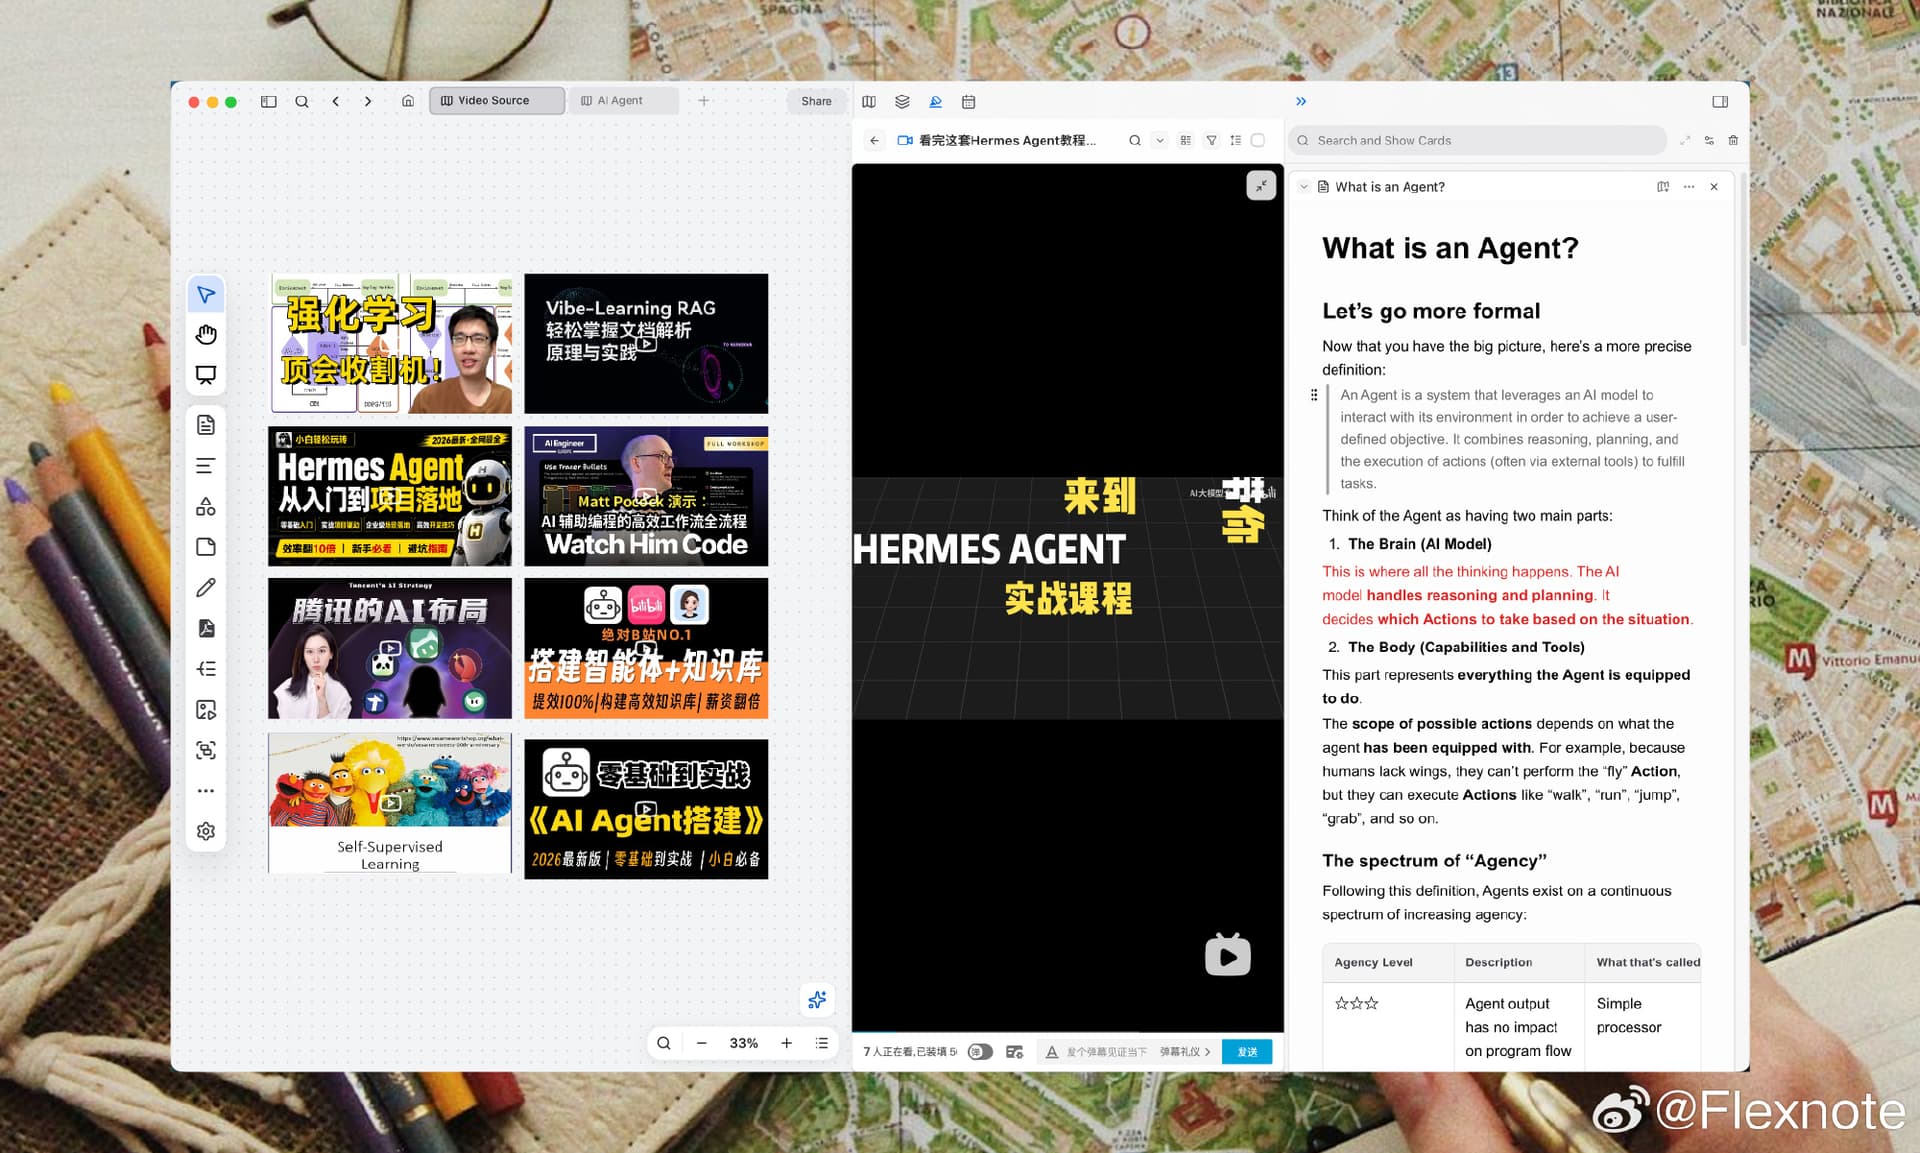
Create a project for this review, then add an "inbox" board inside it. Drag paper PDFs straight in — large local files don't need uploading to the cloud first; web reviews, explainer videos (YouTube and others), or podcasts can go onto the same canvas and be annotated too. From the start, all your material lives in one local-first space that you own.
3. Step 2: Read and annotate the PDF
This is the heart of the workflow. In Flexnote, double-click to open a PDF and read in place, highlighting, underlining, and commenting right on the original. Use colors by purpose — e.g. yellow = core claim, green = method / experiment, blue = citable data, red = doubtful or rebutted.
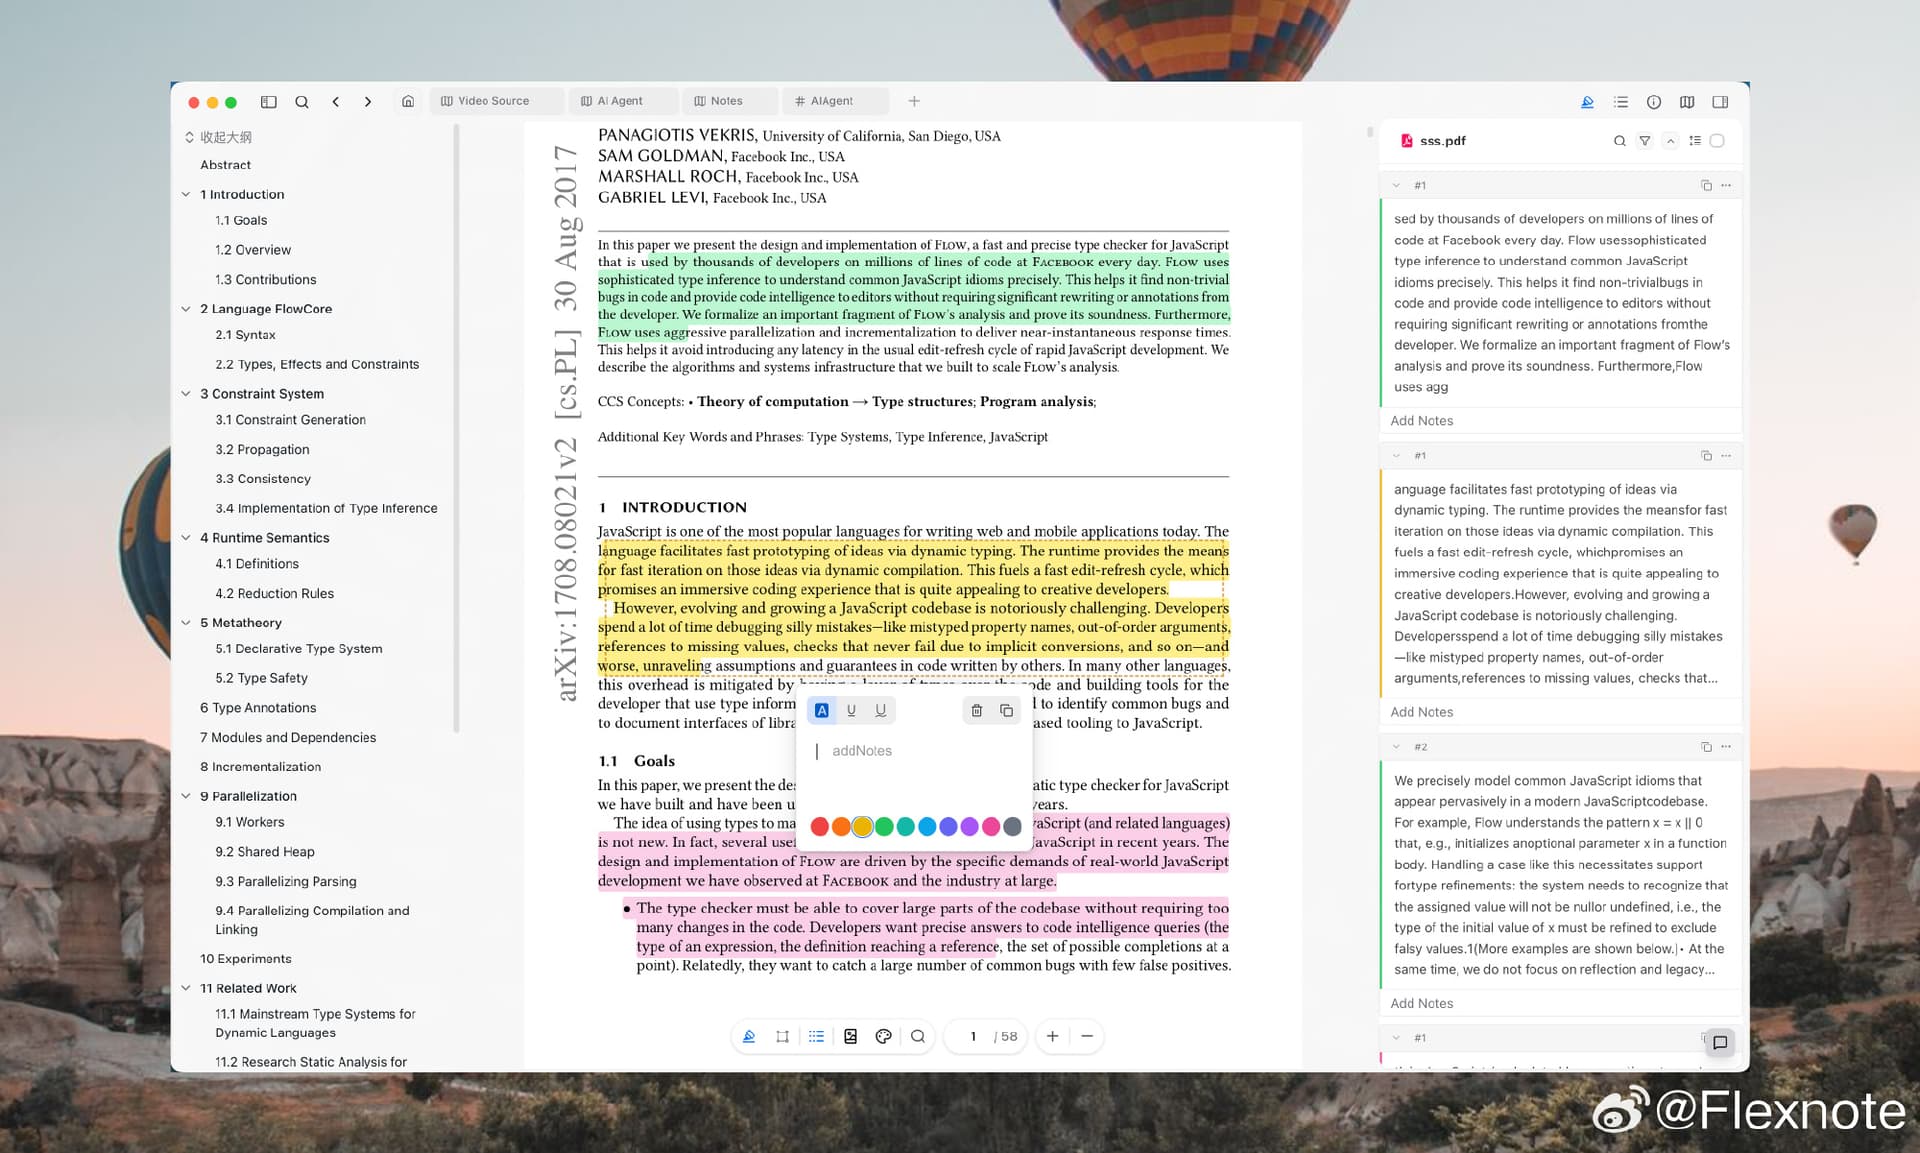
If the paper comes with an author talk or podcast, you can annotate the video / audio with timestamps, pinning down "the assumption is explained at minute 12" and placing it beside the PDF annotations on the canvas as a complement.
4. Step 3: Distill annotations into cards
Highlighting only "marks what matters" — what actually makes knowledge stick is restating it. Rewrite each important annotation into a card in your own words: what it says, why it matters, and who it relates to. The card editor supports Markdown, headings, quotes, and code blocks — enough to carry a full argument — and each card can link back to its source in the PDF, one click away when you need to verify.
Rewriting it in your own words is the only test of "I really understood it."— The core of the Zettelkasten method
5. Step 4: Sort and tag in the Card Library
As cards pile up, the Card Library is your master index. It gathers notes, PDFs, and videos scattered across boards and lets you filter by tag and board. Tag cards by theme (e.g. #research-question, #method-controlled-trial, #theory-school-A), and the skeleton of your review takes shape as you filter — which themes are crowded with papers, which angles still lack discussion, all at a glance.
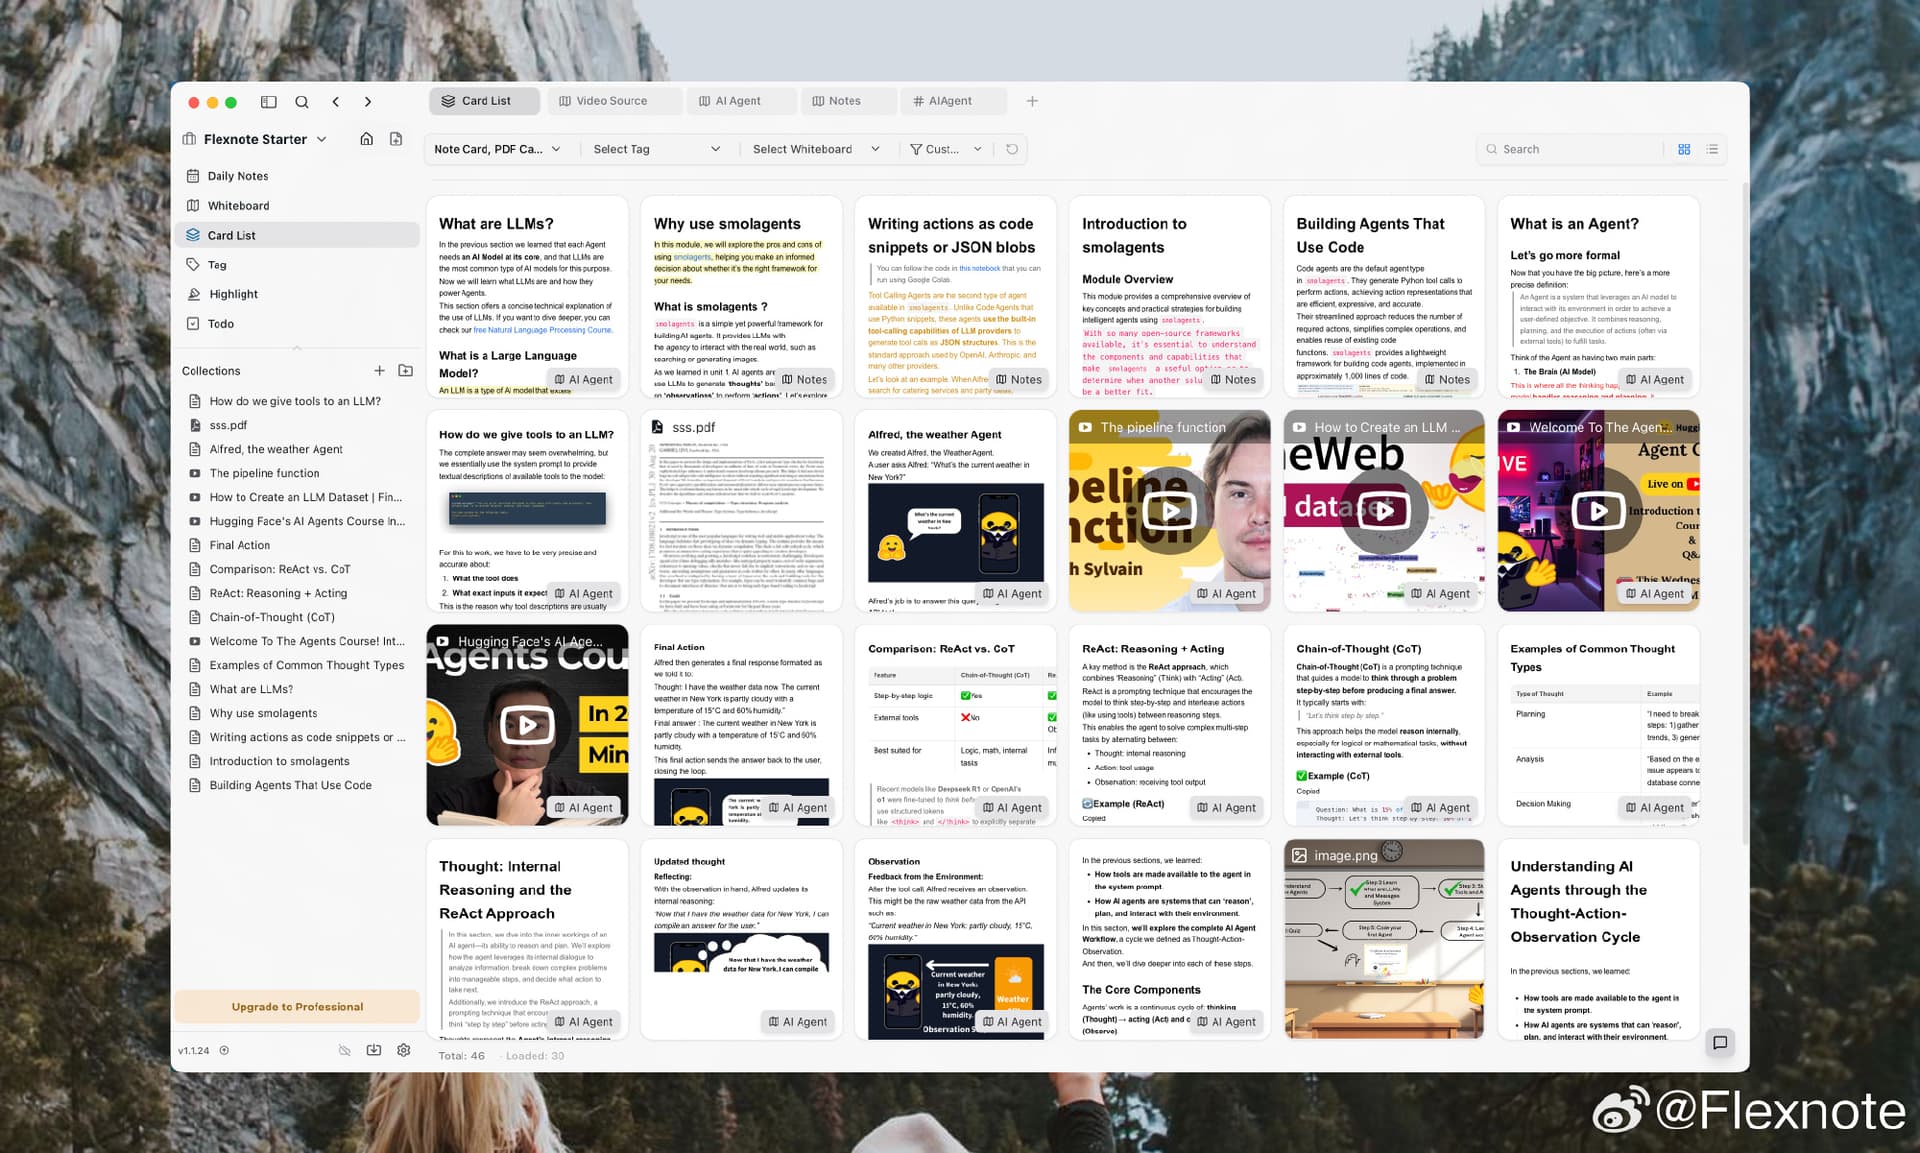
The same card can be reused across multiple boards. That is, one idea from a paper can appear on both your "Methodology" board and your "Points of Contention" board — while you maintain just one card.
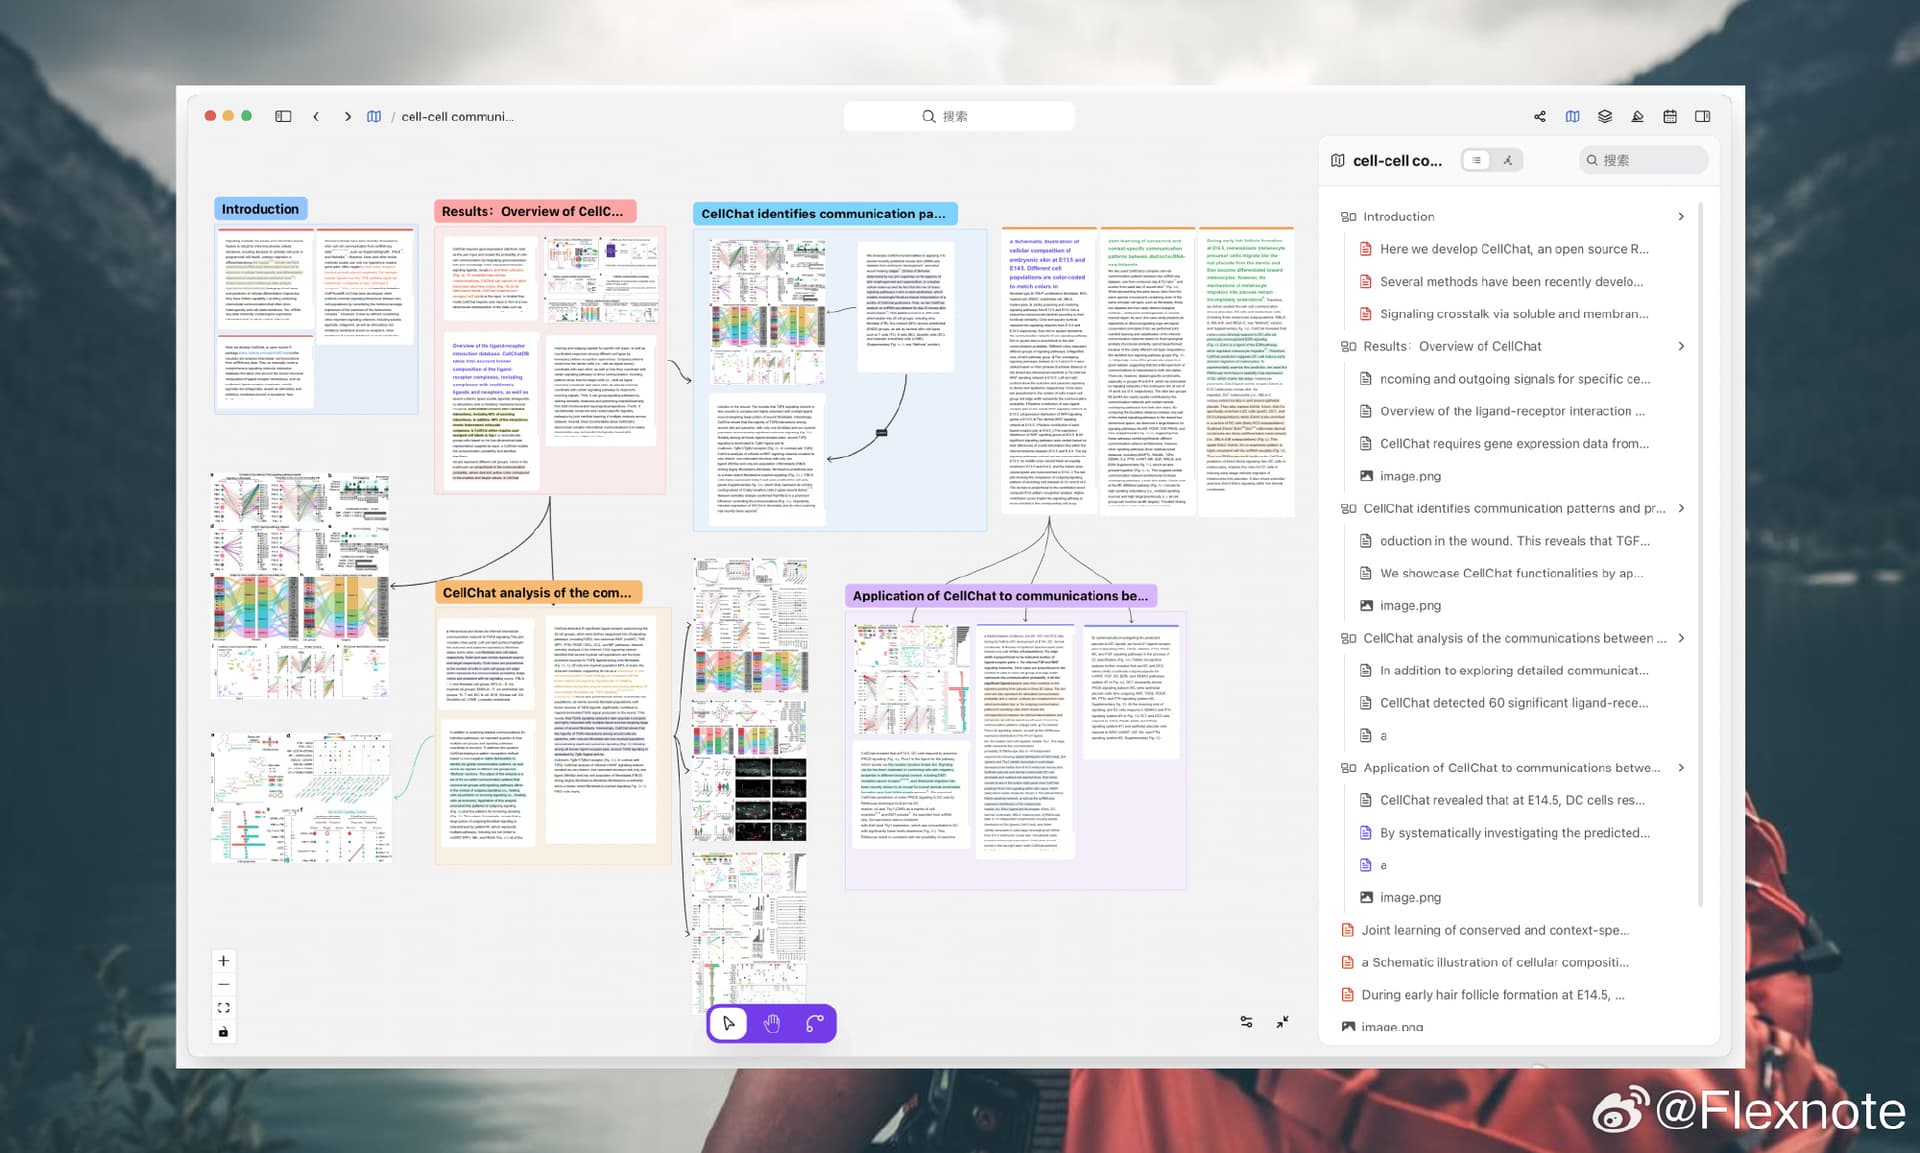
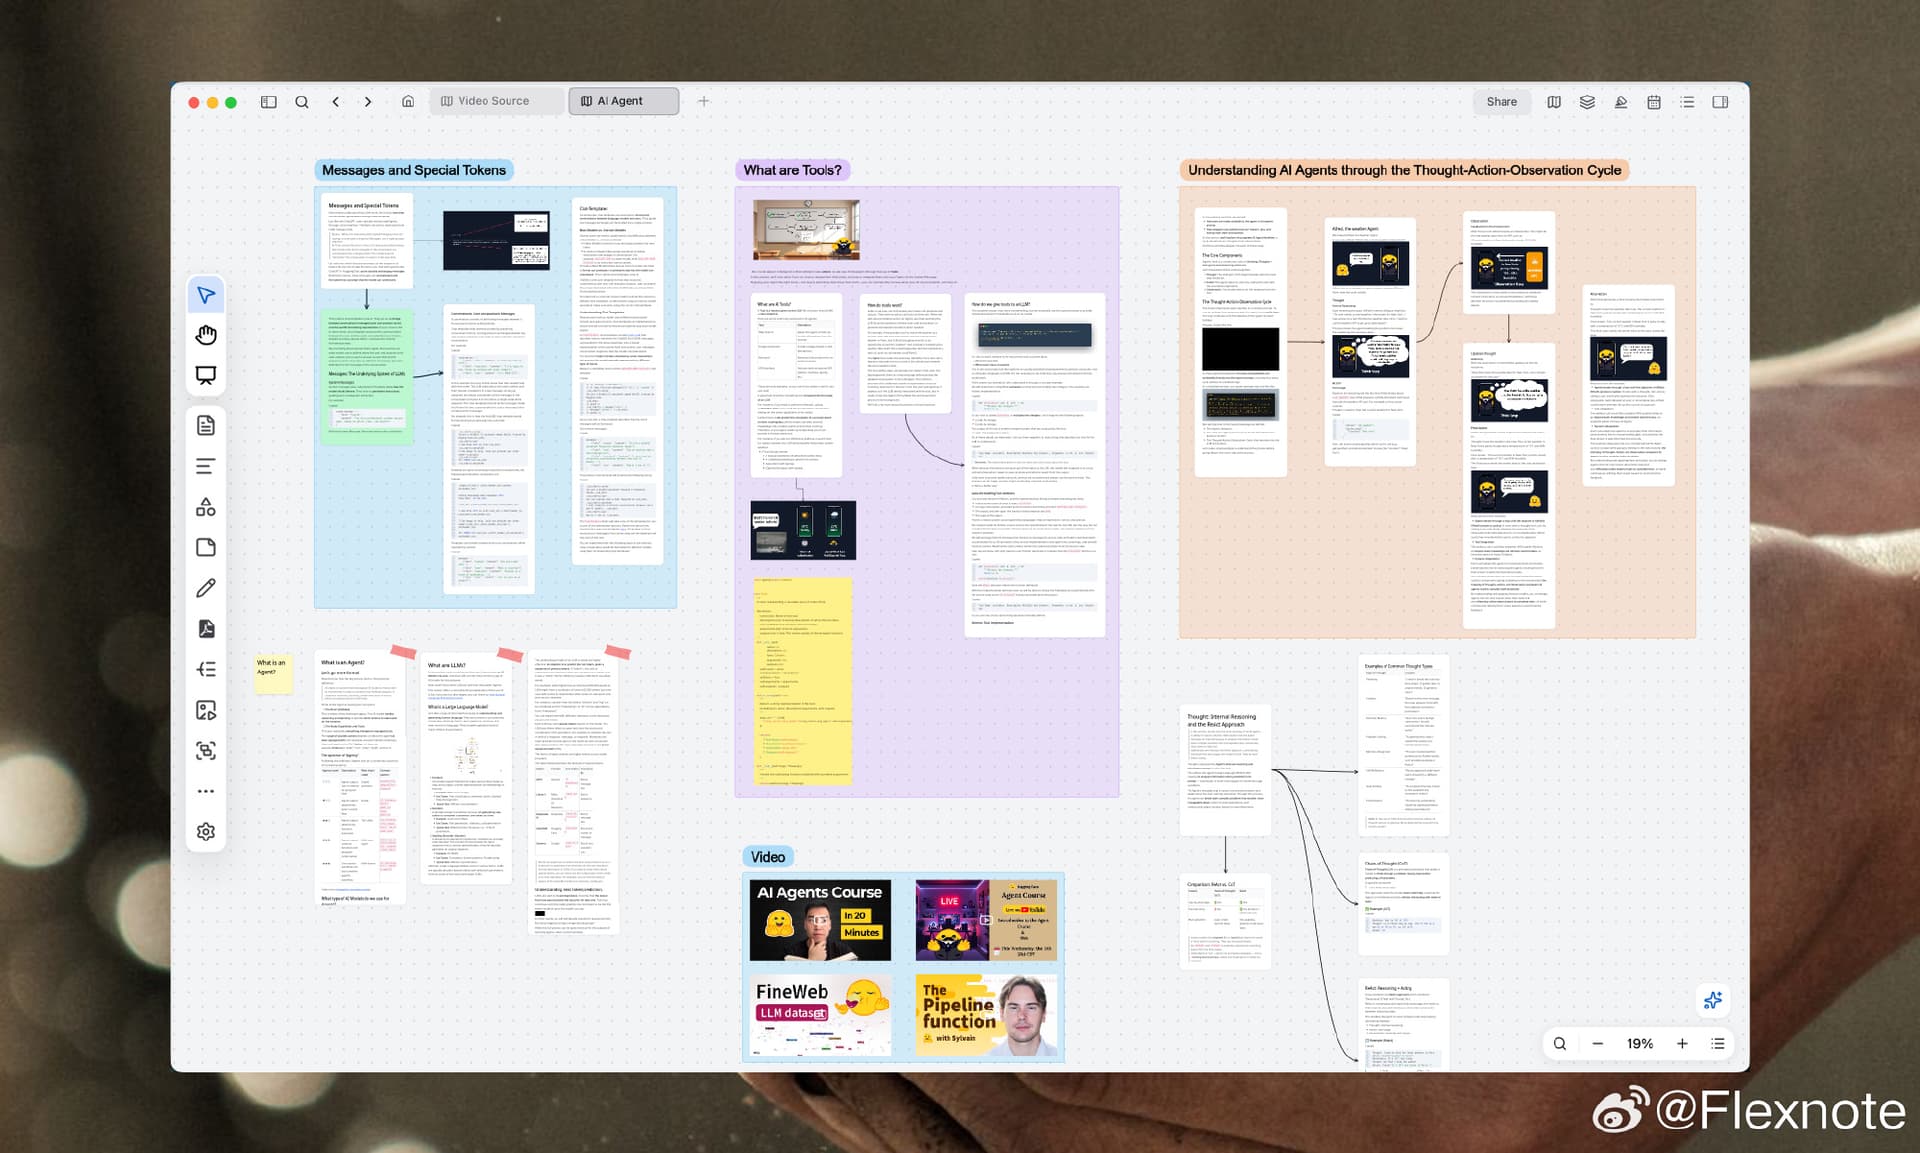
6. Step 5: Connect into a system on the canvas
This is where a review truly "takes shape," and the canvas's biggest advantage over linear notes. Drag related cards onto one board and connect them by argumentative relationship:
- Theme clusters: group papers under the same research question into a cluster to see that camp at a glance.
- Lineage links: use arrows for "supports / rebuts / reuses method / proposes improvement" to make the scholarly dialogue visible.
- Mind maps: start from the "research question" and branch into "established findings — disagreements — gaps" — often the natural outline of the review itself.
7. Output: export or publish your review
Once the threads on the canvas are clear, writing is just "telling the story along the links." Organize paragraphs by the canvas's clusters and arrows, export the whole canvas to PDF as an appendix or concept map, or publish the board to the web, generating a link to send to your advisor, lab mates, or peer reviewers so they can view your literature network right in the browser.
8. The whole flow in one table
| Step | What you do | Output |
|---|---|---|
| 1 Collect | Create a project, drag in PDFs / videos / web pages | One centralized inbox |
| 2 Annotate | Multi-color highlight and comment on PDF / video | Marked-up originals |
| 3 Distill | Rewrite key points into atomic cards in your words | Reusable idea cards |
| 4 Sort | Tag and filter by theme in the Card Library | The review's classification skeleton |
| 5 Connect | Cluster, link, and mind-map on the canvas | Field map + review outline |
| 6 Output | Export to PDF or publish online | A shareable review |
9. A few practical tips
- Annotate first, card later — not at once: while reading, just mark and react; distill cards after finishing a paper, for a more coherent train of thought.
- Fewer tags, not more: a small, stable tag set beats dozens of one-off tags you never reuse.
- Revisit the canvas regularly: after every 5–10 papers, go back to the main canvas and connect once; new papers find their place, and the gaps grow clearer.
- Accumulate long-term with a lifetime license: a literature library is an asset that grows more valuable with use; local-first + a one-time purchase means no worrying about a lapsed subscription or locked-up data.
A literature review isn't "listing the papers you've read" — it's reorganizing a field's dialogue into your own map. PDF annotation handles "getting it in," cards handle "making it stick," and the canvas handles "connecting it up." Get this pipeline flowing, and writing the review turns from "nothing comes out" into "just narrate the canvas."
Related articles
The 6 Best Local-First Note-Taking Apps in 2026 (That Actually Give You Your Data)
Cloud notes raise prices, shut down, and trap your data. More people are switching to local-first. This compares 6 local-first note apps — Obsidian, Logseq, Anytype, Joplin, Standard Notes, and Flexnote — across data ownership, encryption, sync, annotation, and price, so you can match yourself by need.
ComparisonFlexnote vs Anytype: Where Two Local-First Note Apps Differ (2026)
Both lead with local-first, but Flexnote and Anytype take two paths: one is an end-to-end-encrypted open-source object database, the other a research-focused card canvas that annotates PDFs, video, and audio. A fair comparison across core model, encryption, annotation, canvas performance, platforms, and pricing.
Product GuideWhat Is Flexnote? A Complete Guide to How It Works and Who It's For (2026)
Flexnote is a local-first, card-based whiteboard note app that combines cards, an infinite canvas, PDF / video / audio annotation, and third-party cloud sync in one offline-capable workflow. This complete guide covers what Flexnote is, how it works, who it's for, and how it differs from other note apps.